|
Project: Painting a cat and Scratch Art of the Cat
Materials: Video: “Painting a Cat and Scratch Art of a Cat,” reference picture of a cat, tempera paint, paintbrush, chalk, scratch board, engraving tool and 11X14 sheet of paper. Objective: Learn to paint a semi-abstract cat using bold bright colors. Learn the chalk transfer technique and scratch details of the cat on scratchboard and add paint to emphasise the eyes of the cat.. Procedure: Watch the instructional video, “Painting the Cat and Scratch Art of a Cat” once and then watch it again as you paint and complete the scratch art. Pause the video as needed.
0 Comments
Project: Cat Painting Part 1: Grid Drawing, Complete Self and Peer Critiques
Materials: Two videos: “Drawing a Cat on a Grid,” “How to Critique,” reference picture of a cat, plastic page protector, ruler, ultra fine tip permanent marker, and 11X14 sheet of paper. Objective: Review the grid drawing and graphite transfer technique. Review the critiquing criteria and complete critiques of artwork for the last 10 lessons. Procedure: Watch the instructional video, “Drawing a Cat on a Grid” once and then watch it again as you draw. Pause the video as needed. Watch the “How to Critique” video (found on Home page) and complete 10 self critiques and as many peer critiques as time allows. 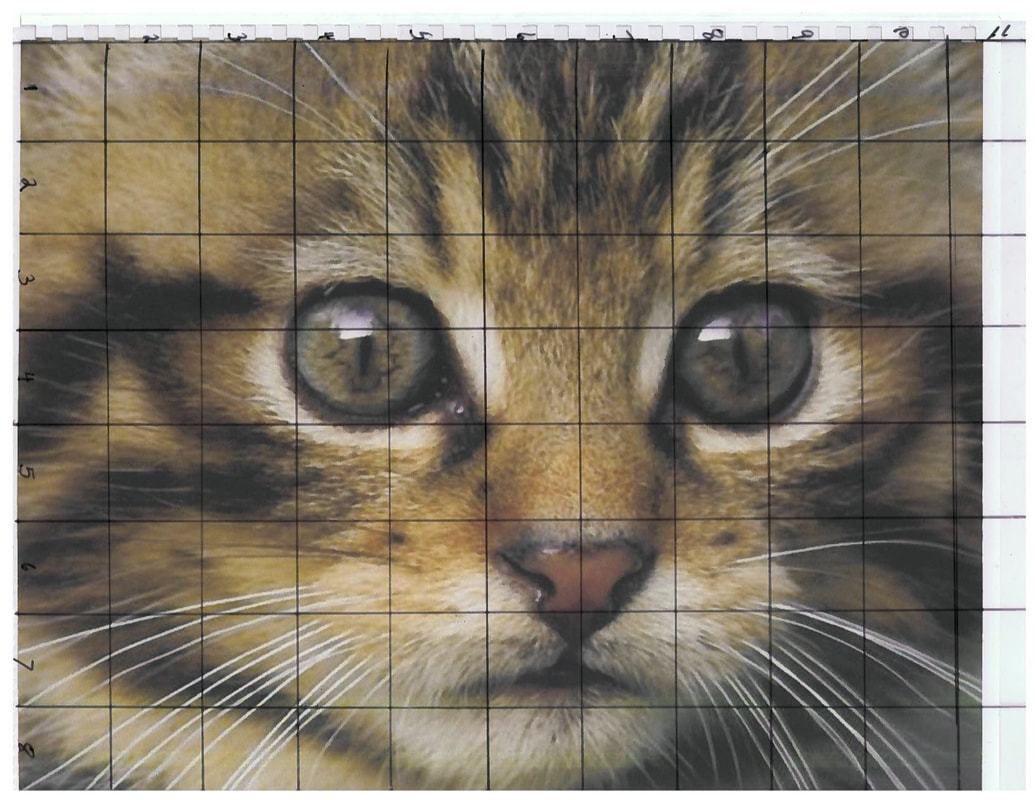
Project: Watercolor Painting of a Succulent
Materials: “Georgia O’Keefe” and “Watercolor Painting of Succulent” video. 9X6 watercolor paper, paint, brush, pencil, and a reference photo of a plant. Objective: Learn about Georgia O’Keeffe. Find or take a reference picture. The photo provided can also be used. Practice painting a plant and creating value with watercolor paint using the wet on dry technique as well as pulling color with water. Procedure: Watch the video about Georgia O’Keeffe first then watch the “Watercolor Painting of a Succulent” video once and then watch it again to paint along with it.
Project: Enlarging, Shading Forms and Shading a Portrait
Materials: “Drawing An Eye” and “Shading Forms and Face” video, 8.5 X 11 paper, pencils, protective sheet, graphite paper, value scale worksheet, form shading worksheet, eraser and photocopies of a face drawing. Objective: Find or take a reference picture, use/make a grid overlay to enlarge, learn to create a value scale, learn to shade forms and then shade a portrait by following video instructions. Procedure: Watch the “Drawing An Eye” and “Shading Forms and Face” video. Look for or take portrait pictures. Complete the worksheets then enlarge and shade your portrait. Post the worksheets, the portrait and critique your work. 10/20/2017 0 Comments Week 8, Lesson 8: Face Painting
Project: Face Painting
Materials: “Face Painting” video, 8.5 X 11 paper, pencil, eraser and photocopies of a face drawing. Objective: Find reference pictures of painted faces and paint designs using paint on photocopies. Procedure: Watch the “Face Painting” video and then look for reference pictures. Paint as many designs as you have time for. Post and critique your best work. 10/15/2017 0 Comments Week 7, Lesson 7: Portraits
Project: Drawing a face,
Materials: “How to Draw a Face,” and “Drawing a face” video, 8.5 X 11 paper, pencil, eraser and photo/printout of a face. Objective: Properly use a grid overlay of a photo or print out of a face to copy the features of a face. Procedure: Watch the “How to Draw a Face” and discuss the contents. Pay close attention to proportions and alignments. Last, watch the “Drawing a face” video once and then watch it again and pause as needed as you draw along to the video. Draw several drawings of the same face and set it aside until next week. We will learn about creating values and complete the drawing with shading.
Project: Refining Designs for Coloring Book Project
Materials: “Revise and Refine” video, 8.5 X 11 paper, pencil, Bic ultra fine pen, sharpie fine point, and printout of reference design pictures. Objective: Critically assess the initial designs on the picture for the coloring book project. Revise and refine the designs. Use fine and ultra fine pens to create a variety of thicknesses in the lines of the design. Procedure: Watch the “Revise and Refine” video. Discuss the contents of the video, look at the current designs and critically assess how the designs can be improved upon. Draw several revisions and then complete a final image that utilizes unity, balance, patterns, emphasis, movement and contrast.
Project: Coloring Book Project
Materials: Sheep and Design Video,, 8.5 X 11 paper, pencil, Bic ultra fine pen, sharpie fine point, printout of reference pictures and a plastic protective sheet. Objective: Learn to create a 1 inch grid, learn more methods of creating designs on an Alaskan animal or plant following cross contour lines. Procedure: Watch the “Sheep and Design” video. Discuss the contents of the video, find an image of an Alaska animal or plant, redraw it using a grid then draw contour lines over it. Add designs that follow the contours. Add designs for the background, too.
Materials: Line Video, instructional video, 8.5 X 11 paper, pencil, Bic ultra fine pen, printout of reference pictures.
Objective: Learn about lines, shapes and patterns. Improve upon the cross contour line project from week 3. Procedure: Watch a video about lines, shapes and patterns. Discuss the contents of the video and then watch the instructional video to complete this week’s project. Make multiple copies of the finished picture and then try out different mediums (color pencil, sharpie, or watercolor paint) to show values and form.
Materials: Video about Van Gogh and an instructional video. Print out of a picture of peppers, 8.5 X 11 piece of paper, pencil, eraser and ultra fine tip marker and pen.
Objective: Find or take a picture of multiple objects piled on top of each other. Learn the graphite transfer method, Draw contour lines on multiple objects in a pile. Procedure: Arrange multiple objects in a pile and then take several pictures or find a picture on the internet. Print out the picture and use a pencil to shade the back of the paper. Place the shaded side down on another sheet of paper. Use a pen to draw all the contour lines. Constantly check that both sheets of paper are lined up. Use an ultra fine black marker to outline the graphite transferred lines. 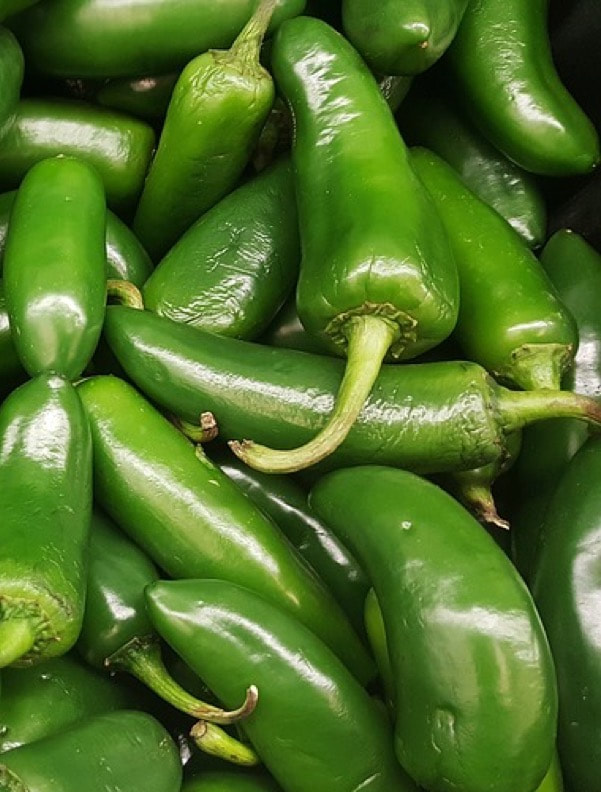
|
AuthorWrite something about yourself. No need to be fancy, just an overview. Archives
November 2017
Categories |
 RSS Feed