|
Middle School Lesson 20:
Project: Movement and Pattern: Falling Circles Materials: “Movement,” “Pattern” and “Falling Circles” videos, pencil, circle stencils, white and black 9 X 12 construction paper and glue stick. Objective: Learn about movement and pattern. Use circular shapes (lids of containers and or cups) as stencils to trace different size circles. Cut out as many black and gray circles in various sizes to arrange on a sheet of white paper to create a visual illusion of movement. Procedure: Watch the videos “Movement” and “Pattern.” Next, discuss the contents of the videos. Finally, watch the video “Falling Circles” once and then watch it again as you complete the project. Pause as needed.
0 Comments
Project: Contrast and Emphasis: Initial Design
Materials: “Contrast” “Emphasis” and “Initial Design” videos, pencil, Sharpe, 8 X 10 (cut white and black) construction paper and a red marker. Objective: Learn about contrast and emphasis and then cut letters. Create an organic design. Use a black sharpie to outline the design to show contrast. Color an important detail red to show emphasis. Procedure: Watch the videos “Contrast” and “Emphasis.” Next, discuss the contents of the videos. Finally, watch the video “Your Initial Design” once and then watch it again as you complete the project. Pause as needed. 4/23/2018 0 Comments Lesson 16, 17, 18: BalanceLesson 16: Symmetrical Design
Project: Symmetrical Design of a Raven
Materials: “Balance” and “Symmetrical Balance ” video, pencil, sharpie, scissors, straws, color pencils or markers, white 9 X 12 construction paper, white 8.5 X11 printer paper and wire. Objective: Learn to create a tetrahedron using straying and wire. Next, learn about Symmetrical balance and then create half a design on folded paper to use as a stencil and then trace it on white construction paper. Procedure: Watch the video “Balance” and discuss the contents of the video. Next, watch the video “Symmetrical Balance” video once and then watch it again as you complete the project. Pause as needed. Lesson 17: Asymmetrical Balance
Project: Asymmetrical Design of a Tree
Materials: “Balance” and “Asymmetrical Balance K2” video, pencil, Sharpie and white 9 X 12 construction paper. Objective: Review the contents of the positive and negative space video. Next, review the Balance video . Learn about asymmetrical balance and then create a design of a tree in a traced triangle on white construction paper. Procedure: Review the videos, "Negative and Positive Space," and “Balance.” Next, discuss the contents of the video. Finally, watch the video “Asymmetrical Balance ” video once and then watch it again as you complete the project. Pause as needed. Lesson 18: Radial Balance
Project: Radial Design of Ravens
Materials: “Balance” and “Radial Balance” video, pencil, scissors, Elmer's glue, white 9 X 12 construction paper and a tetrahedron. Objective: Learn about radial balance and then create a design in a traced triangle on white construction paper. Create a stencil of a raven to place on the radial design. Once all six designs have been completed, cut out the triangles and glue them to the tetrahedrons. Next, wire the two tetrahedrons together so that the tree designs are on the bottom and the raven designs are on the top. Procedure: Review the video “Balance” and discuss the contents of the video. Next, watch the video “Radial Balance ” once and then watch it again as you complete the project. Pause as needed.
Middle School Lesson 15: Pointillism: Olive Tree
Project: Painting an Olive Tree in the Pointillistic style Materials: “Georges Seurat,” and “Pointillism: Olive Tree” videos, tetrahedron, pencil, tempera paint, 9X12 sheet of white paper, Q-tips, water container and palette. Objective: Learn about Georges Seurat and the Pointillism style of painting. Learn how to place different colors next to each other in order to create optical mixing and give an illusion of form. Procedure: Watch the instructional videos, “Georges Seurat” and then watch “Pointillism: Olive Tree” once and then watch it again as you draw and paint. Pause the video as needed. 2/16/2018 0 Comments Lesson 14: Tree in a Triangle
Middle School Lesson 14: Tree in a Triangle
Project: Painting an Organic Tree with Geometric Concentric Circles using color families Materials: “Color Wheel,” “Shapes,” and “Tree in a Triangle” videos, tetrahedron, pencil, oil pastels, 9X12 sheet of white paper, paint brush, water container and watercolor paint. Objective: Review the color wheel, and recognize the different color combinations and/or color families like: warm and cool colors, primary, tertiary, secondary, analogous, complementary, and the rainbow colors. Also learn about geometric and organic shapes. Draw a tree that is organic in shape and have the parts of the tree touch each side of the the triangle. Draw geometric, concentric circles and then use oil pastels to color in the circles with color combinations and families. Procedure: Watch the instructional videos, “Color Wheel” as well as “Shapes” and then watch “Tree in a Triangle” once and then watch it again as you draw and paint. Pause the video as needed.
Middle School Lesson 13:
Project: Building A Tetrahedron & Designing a Raven Materials: “Elements of Art,” “Principles of Design,” “Building a Tetrahedron and Designing a Raven” videos. Reference picture of a raven, fine tip sharpie, straws, wire or string and 9X12 sheet of paper. Objective: Review the Elements of Art and Principles of Design. Learn to build a tetrahedron and create designs that follow the cross contours of a raven. Utilize patterns, shapes, along with thick and thin lines. The designs should show contrast, movement, pattern and emphasis. Procedure: Watch the instructional videos, “Elements of Art” as well as “Principles of Design” and then watch “Building a Tetrahedron and Designing a Raven” once and then watch it again as you build the tetrahedron then design a Raven. Pause the video as needed. 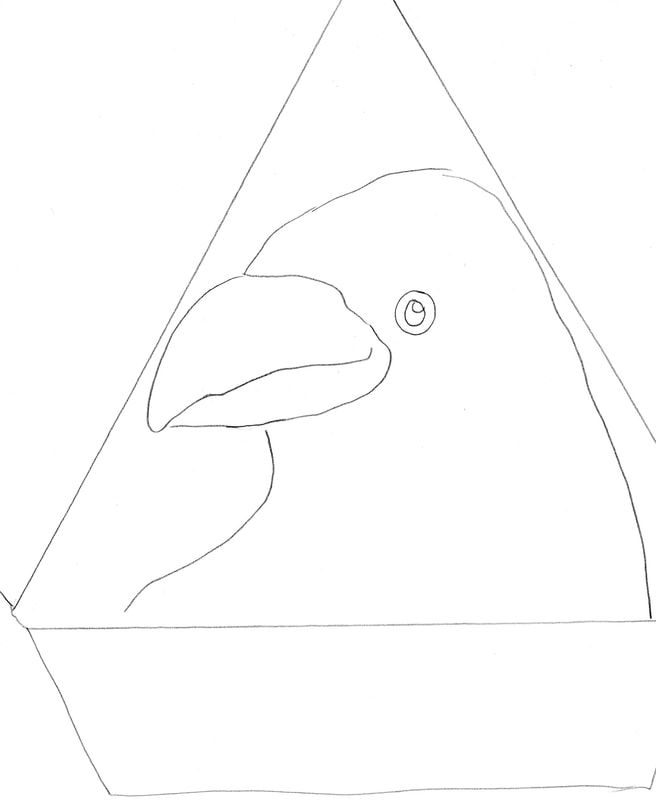
|
AuthorWrite something about yourself. No need to be fancy, just an overview. Archives
May 2018
Categories |
 RSS Feed